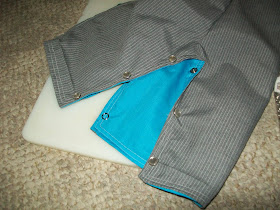
To get the pattern for this jumper check out last week's post :D
Supplies:
DIY Pattern
2 Buttons
Snaps & snap maker
matching thread
1 yard of Blue (or whatever color you want) fabric
1 yard of pin-stripe fabric (or one pair of pin-stripe pants)
Sewing machine or hand needle
seam ripper :P
Cut 2 of each color, from each of the pattern pieces.
Sew the center seam of each piece, making 4 total remaining pieces. 2 front 2 back.
Then sew the matching colors together along the side seams. You will end up with two jumpers.
Put the blue fabric jumper right side out (you want the right sides facing each other), inside the pinstripe jumper. Sew along the top edge, JUST THE TOP EDGE. Don't try and get ahead by sewing the legs now too... not like I know this from experience or something..... *whistles*
Top stitch your edging.
Turn it inside out so that the wrong sides are facing each other. Fold in the edges or if your really dexterous.. sew the legs through the other legs.. it's confusing but works.
Fold in the hem & top stitch the pants. You can make a really neat double line effect, without a twin needle, by using the same line on your foot plate & just adjusting your needle position.
Add your button hole, button and snaps.
Tah Dah! Reversable Jumper!
Try it on your favorite little guy.
It only took me about 4 naps to make it :P
You may need the seam ripper to readjust the sides like I did... :P I do suggest making a muslin version first, to check the fit. :D I know I'm going to be making a few adjustments to my pattern and then making more :) Yep.. My hubby is gonna start missing some pants :D


No comments:
Post a Comment
I love comments! What are your thoughts?